Strawberry Fig Jam
We have become serious jam hoarders in the past couple of years.

I would say it’s becoming a problem, but really, when we’re stocked on homemade jam and don’t really want to share with anyone – is that actually a problem? I don’t think so.
And we do share. With family. But that’s it. And honestly, it’s hard to see those jars disappearing around the holidays when we’re giving them away as gifts. But we know that our family loves jam as much as we do, so it’s worth it to share.
,
I just love walking downstairs and seeing our basement shelves filled with the jeweled toned jars or opening the fridge and being able to pick what jam I want on my biscuits or toast. Knowing you made something yourself automatically makes it taste better, too, right? You put in the time and the effort and the end result is always seems sweeter.

I’m no expert when it comes to canning – I just started a few years ago – but jam is definitely one of my favorite things to make. It’s one of the easiest things to can, so it’s the best way to get your feet wet.
If you can chop fruit, let it simmer, ladle it into jars, and then let the jars cook for 12-15 minutes, you’ve got it! You’re closer to homemade jam than you think.

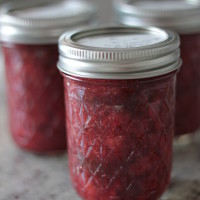
Strawberry Fig Jam
A spin on classic strawberry jam, this mix has a little extra oomph from the light flavor of the figs. If you don't have fresh figs and can get frozen, they work great! Let them thaw before pureeing them, then cook the same.
Ingredients:
- 3 cups figs, pureed
- 3 cups strawberries, hulled and halved
- 1.5 cups agave syrup
- 3 Tbsp low sugar pectin
Directions:
- Cut the stems off the figs (either fresh or thawed if frozen) and add them to your blender. Puree the figs on low speed until it's mostly smooth and broken down. If there are still a few larger pieces of fig, that's fine.
- Place the strawberries, figs, agave, and pectin in a large pot and bring to a boil.
- Cook on medium, stirring, keeping the heat up enough so the fruit mixture stays at a low, rolling boil.
- While the fruit mixture is heating, place jar lids in a small pan of water and simmer. Get your jars and lids ready for canning and have a large pot of water heating on the stove top.
- Once the berries have mostly broken down and the mixture is thickened slightly, remove from the heat.
- Fill each jar and leave 1/2 inch headspace, place a lid on the jar and secure the ring.
- Process in a water-bath canner for 12 minutes.
- Remove from canner and let the jars sit, unmoved, for a few hours until they have cooled and the lids have popped.