If there’s one thing I love, it’s coffee. I know, I know – I talk about this all the time. Heck, I’m working on a book of recipes all using coffee!
So if anyone gives me a chance to try something coffee related, I say yes.
Let’s….just call it research, okay? From now on, it’s all research.
My favorite way of enjoying coffee is piping hot, with just a touch of cream or milk. Or iced, if it’s really steamy in the summer. But most days, I’m a hot coffee girl. Always and only in the morning, unless it’s decaf later in the day. If I have any caffeine after noon, I get shaky and that is not fun.
A week ago, I got an email asking if I wanted to try this new Nescafe with Coffee-Mate and share a giveaway with you guys, and I couldn’t turn down the chance to try something coffee-related. Plus, I love sharing giveaways with you! It’s always fun to get mail – especially food-related mail.
Every year around this time, I think that canning season is over.
And I’m always wrong.
There are still so many things you can can! Apples, pears, fruit butters, pumpkin butter, soups, curds….it’s never ending. I’ve never done apple butter or pumpkin butter or a curd of any kind, but they are ALL on my list for this year!
So we’re starting the season off right with some Ginger Pear Preserves.
This is probably one of the easiest canning recipes I’ve ever made – and so delicious! I love ginger in anything – I don’t think you can ever go wrong using ginger.
And even though I’m not a huge fan of fresh pears by themselves, I love pear spreads and butters, especially when it’s cooked with crystallized ginger, sugar, and lemon.
If you haven’t canned anything before, this is the perfect recipe to start with. And if you don’t want this many jars of ginger pear preserves – although, why wouldn’t you?! – cut it in half! Easy. If you have enough pears to do the entire recipe, I would.
Canned items make for great holiday gifts, and it’s always nice to have extras on your shelf, for emergencies, too.
This recipe was originally printed in the Imperial Sugar 125th anniversary cookbook. Check out the recipe here! I tested the recipe and updated some pictures for Dixie Crystals. Some recipes, like this one, are worth holding on to.
Alright, I asked on Facebook, and you guys wanted the dried herbs first – so… your wish is my command!
For the first time EVER, my basil is growing like crazy. Normally, I don’t do well growing herbs. Except rosemary – that stuff is indestructible! For some reason, I’ve just never been good at getting herbs to grow well or keeping up with them if they were. I think this also happens because once our bigger garden is producing, I kind of forget about anything that isn’t in that same space. So it’s completely my fault. But I made an effort this year, and it paid off.
I was also totally pruning basil wrong all these years! No wonder it died off so early. Now I know how to pick basil (the right way), I have a healthy plant that’s still producing – which is why I’ve started to dry some for the winter!
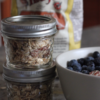
My first batch of dried herbs was half basil and half oregano (another herb that is going nuts right now – I have so. much. oregano). Also: why in the world doesn’t normal dried oregano smell anything like fresh oregano? Fresh oregano is so different than your typical dried oregano – it’s so sweet smelling! I really hope this homemade dried stuff keeps some of that flavor.
To dry these, I took the easiest / laziest option. I didn’t want to leave these in a super low oven for days, and I don’t have an actual dehydrator. So, paper towels + patience won out!
This may be the easiest thing you’ll ever do! The only step is to pick your herbs.
Then you wait. For days. I actually left these sitting for almost 2 weeks (I forgot about them on the porch!). And they’re still perfect.
Eggs. I love eggs! I’ll put eggs on just about anything – toast, grits, pancakes (the BEST), rice, pasta.
They’re one of the easiest things to cook, but can also be one of the hardest. Scrambled eggs, poached eggs, souffles….every egg dish is completely different than any other. This is usually fun, but kind of frustrating sometimes! It’s not like cooking pasta, where you know the method is the same each time.
I’m still working on perfecting scrambled eggs, but we’ve finally got our favorite + easiest + best way of cooking perfect sunny side up eggs.
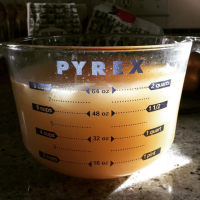
First, you want a medium pan over low heat. LOW heat. This is important, because you’re never going to flip these eggs (hence, the sunny side). You want the heat low enough that they can sit and cook until the eggs are done without them burning or browning too much.
While the pan is heating, drizzle in your choice of oil until the entire bottom of the pan is coated, generously. We usually use olive oil, but grapeseed or any other neutral oil would be great. Depending on your size pan, it’ll probably between 2-4 Tbsp of oil, possibly more. Don’t be shy! You need the oil to help with the cooking process – you won’t be eating all of it with the eggs.