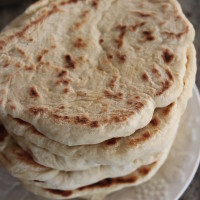
skillet pita bread
There are some things that shouldn’t be tried at home.
The chocolate bomb dessert at our favorite place in town, for instance. Even if I knew the steps and had a pretty good feeling about trying it on my own, I wouldn’t even want to CHANCE ruining it. It’s worth it to me to have it every so often and savor every perfect layer.

Homemade pita bread used to be on the “don’t try at home” list for me. There’s this little greek place downtown that has the best gyros and hummus and serves the fluffiest, doughiest pitas, and I love them. I love them so much I’ve purchased bags of them to bring home for our own meals or to freeze to use later. They are the best.
But we don’t always have time to get downtown when I want them at home – and grocery store pitas aren’t worth the money. So I finally decided it was time to try making an easy pita bread at home.
And these did not disappoint!

My favorite thing about this recipe is that you don’t have to bake anything! So besides the rising time and rolling out, these don’t have much hands on time at all.
Once you divide the dough and roll each out into a round, you put it in a hot skillet for about a minute on each side – and that’s it. Honestly!
Perfect pita bread, cooked in a skillet in less time than it would take to preheat your oven.

Next time you need pitas for a meal at home, try these out. Warm, toasty, fluffy pita. They’re basically a new food group.

Skillet Pita Bread
Thinking of trying some homemade pitas but feeling intimidated? No worries with this recipe. It's simple! Most of the time involved is hands-off while the dough is rising, and the pitas are cooked quickly in a hot skillet. Have these on the side of a platter dinner with hummus, veggies, olives, and some grape leaves and you're set.
Ingredients:
- 1 cup warm water (not hot, but warmer than room temperature)
- 1 package Red Star Platinum Yeast (about 2 1/4 teaspoons)
- 2 3/4 cups all purpose flour
- 1 1/5 teaspoons salt
- 2 teaspoons olive oil
Directions:
- Mix the water and yeast together, and let sit for about five minutes until foamy. Add 2 1/2 cups of the flour, salt, and olive oil. Mix until a shaggy dough is formed.
- Sprinkle the last 1/4 cup flour onto your clean work surface and turn out the dough. Knead the dough for about 5 minutes, until the dough is smooth and elastic. Add more flour (if needed) to keep the dough from sticking to your hands or the work surface.
- Set the dough back in the bowl and add another teaspoon or so of olive oil, then turn the dough until it's coated. Cover with a clean dishcloth or plastic wrap and let the dough rise until it's doubled in bulk, 1-2 hours.
- Once the dough has doubled, gently punch down the dough and turn it out onto a lightly floured work surface. Divide the dough into 8 equal pieces and flatten each piece into a thick disk. Sprinkle the pieces with a little more flour and then cover them with a kitchen towel or plastic wrap wrap until you're ready to cook them.
- Roll one of the pieces into a circle 6-8 inches wide and about a quarter inch thick. Sprinkle with a little extra flour if it's starting to stick. If the dough starts to spring back, set it aside to rest for a few minutes, then continue rolling. Repeat with the other pieces of dough.
- Warm a cast iron skillet over medium-high heat until drops of water sizzle immediately in the pan. Drizzle a little oil in the pan and wipe off the excess.
- Lay a rolled-out pita on the skillet and cook for a minute, until you see bubbles starting to form and edges look set. Flip and cook for another minute, until large toasted spots appear on the underside. Keep cooked pitas covered with a clean dishtowel or in a warm oven while cooking the rest of the pitas. *Pitas are best when eaten immediately after cooking. Leftovers will keep in an airtight bag for several days and can be eaten as is or warmed in a toaster oven. Baked pitas can also be frozen with wax paper between the layers for two to three months.
Make sure to follow Red Star Yeast on Instagram for more baking inspiration!
This post is sponsored by Red Star Yeast. As always, all opinions and recipes are my own. Thank you for supporting brands that support us!